
Blog
How to Clean and Protect a Natural Leather Armchair at Home?
Oct
Quick Summary
To clean a leather armchair at home, first identify its finish, then brush or vacuum away dust with a soft attachment before wiping with a pH-neutral leather cleaner for upholstery. Work in small sections, test on a hidden area first, avoid soaking the leather, and let it air dry away from heat. Then protect it with a leather conditioner suited to your finish.
- Identify your leather finish first, since the wrong cleaner can strip a protective coating.
- Test the cleaner on a hidden area and wait a few minutes before continuing.
- Work in small sections with light pressure and never soak the leather.
- Give seams, creases and cushion edges the most attention, since dirt concentrates there.
- Never rub a stain; blot or dab from the outside edge inward.
Table of Contents
- Identifying Your Leather Type and Finish Before You Clean
- Gathering the Right Tools and Products for Your Armchair
- Step-by-Step: Cleaning Your Leather Armchair
- How to Remove Stains from Leather Upholstery Safely
- Drying and Protecting Your Leather Armchair from Everyday Damage
- How Often to Condition Leather Furniture
- Spotting Damage Early and When to Call a Professional
- Booking Your Next Leather Care Session with Tetrad Specialists
- Frequently Asked Questions
Identifying Your Leather Type and Finish Before You Clean
Last Updated: October 28, 2026
Natural leather armchairs look simple, but they come in several finishes, and the wrong cleaner can strip the protective coating off one in a single wipe.
Leather finish is the surface layer applied to the hide, and it decides how the chair handles water, oil, and cleaning products. A protected top coat beads water; an unfinished or aniline hide soaks it up quickly.
Look for these signs to work out what you have:
- Matte or slightly textured surface: Often a semi-aniline or protected finish that resists everyday dirt well.
- Glossy or smooth surface with a shine: Usually a pigmented or coated finish that tolerates gentle wiping.
- Visible grain that looks natural and absorbs liquid: Typically an aniline finish, which needs extra care.
Gathering the Right Tools and Products for Your Armchair
Good results depend more on gentle tools than on strong products. Most natural leather armchairs need only a handful of basic items.
Start with these essentials:
- A soft brush, or a vacuum with a soft brush attachment
- Two clean, soft, dry microfibre cloths
- A soft sponge for applying cleaner
Avoid suede brushes and abrasive scrubbing pads, which can scratch the surface. Keep all tools clean and dry, because grit trapped in a cloth will scratch the leather as you wipe.
Finally, check the product label against your leather type.
Step-by-Step: Cleaning Your Leather Armchair
Work in one section at a time so the leather never dries unevenly. The order below targets the places that collect the most dirt: seams, creases, cushion edges, and the tops of the arms where hands and clothing rub.
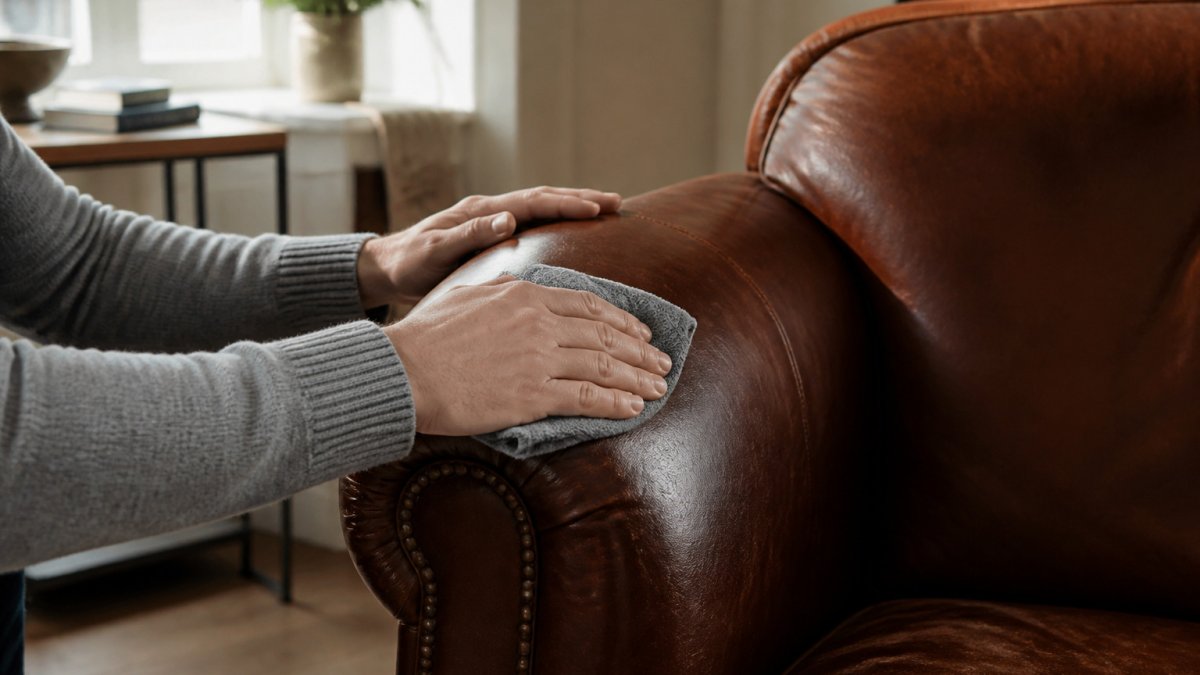
Step 1: Remove dust and loose debris
Start with the driest step: a soft brush or a vacuum with a soft brush attachment on the lowest suction setting. Work from the top of the backrest downward so dust does not fall onto areas you have already cleaned.
Pay particular attention to:
- The seam between the backrest and the seat cushion
- The crease where the seat cushion meets the arms
- The piping or welt line around the cushion edges
Brush in the direction of the grain, then wipe the whole chair with a dry microfibre cloth to lift fine dust that would otherwise smear once moisture is added.
Step 2: Test your cleaner
Pick an inconspicuous area, such as the underside of an arm or the back edge of the seat. Apply a small amount of cleaner to a cloth and dab it on. Wait a few minutes, then check for colour loss, stickiness, or dullness. If the test area looks fine, continue.
Step 3: Clean the backrest and inside arms
Apply cleaner to your soft sponge or cloth, not directly onto the chair. Work in small sections with light pressure, starting at the top of the backrest and working downward.
Do not soak the leather. Wipe, then move on. Once a section looks even, wipe away any cleaner residue with a clean, damp cloth wrung out well, then go over it with a dry cloth.
Step 4: Clean the seat cushion and creases
The seat cushion is where crumbs, grit, and body oils collect most. Lift it if removable and clean both sides and the edges. Reach into the crease where the cushion meets the back and arms with a soft brush or a cloth wrapped around a finger.
For fixed cushions, work the cloth into the crease gently and avoid pressing cleaner into the stitching.
Step 5: Clean the outside arms and back
These areas collect less body oil but more dust and scuffs from furniture and walls. Wipe with a cloth lightly dampened with cleaner, then dry. Check the lower edges and feet, where dust and grit gather.
Step 6: Clean hard-to-reach areas
Use a soft brush or a vacuum crevice tool with a soft brush attachment for:
- The gap between the seat and the arms
- The folds at the back corners of the seat
- The underside of the arms
Wrap a microfibre cloth around a soft brush handle to reach into tight folds without scratching. Do not use sharp tools, and do not force anything into seams.
Step 7: Dry and inspect
Let the chair air dry naturally, away from radiators, fires, and direct sunlight, with air circulating so moisture does not get trapped in the cushions. Applying a high-quality conditioner during this inspection phase remains the most effective method for preventing leather cracking, a practice that is equally vital when maintaining the upholstery in your vehicle.
Cleaning an armchair is not the same as cleaning a flat sofa. The seams, creases, cushion edges, and arm tops are where dirt and wear concentrate, so give them the most attention and the least moisture.
The steps below summarise the cleaning process, with the time or focus for each stage.
| Step | What to do | Focus |
|---|---|---|
| 1. Remove dust | Brush or vacuum with a soft attachment, top to bottom | Seams, creases, cushion edges |
| 2. Test cleaner | Dab a small amount on a hidden area, wait a few minutes | Check colour loss or stickiness |
| 3. Clean backrest and inside arms | Wipe in small sections with light pressure | Do not soak the leather |
| 4. Clean seat cushion | Lift if removable, clean both sides and edges | Crease where cushion meets back and arms |
| 5. Clean outside arms and back | Wipe with lightly dampened cloth, then dry | Lower edges and feet |
| 6. Reach hard areas | Use soft brush or crevice tool | Gaps between seat and arms |
| 7. Dry and inspect | Air dry away from heat and sunlight | Check seams for wear or cracking |
How to Remove Stains from Leather Upholstery Safely
Stains need a calm, specific response. Acting quickly helps, but rushing with strong products can cause more damage than the stain itself. Identify the stain type before you touch it.
Never rub a stain. Rubbing pushes the substance into the hide and can spread dye or grease across a wider area. Always blot, lift, or dab from the outside edge inward.
Liquid spills: water, tea, coffee, soft drinks
Blot immediately with a dry, absorbent cloth, pressing gently and replacing the cloth as it becomes wet. Do not wipe. If the spill has dried, dampen a cloth with warm water, wring it out thoroughly, and dab lightly, then dry with a clean cloth and let the leather air dry. For protected finishes this is usually enough; for aniline or unfinished leather, use only a barely damp cloth and stop if the colour starts to move.
Grease, oil, and food fats
Dust the mark with cornflour or talcum powder and leave it several hours, ideally overnight, to draw out the oil, then brush it off. If a mark remains, dab a small amount of pH-neutral leather cleaner onto a cloth rather than rubbing. Avoid dish soap on grease: it can strip the finish and leave a dull patch.
Ink and felt-tip marks
Ink is one of the riskiest stains on natural leather. Never use nail varnish remover, acetone, or alcohol-based solvents, which can dissolve the finish and leave a permanent pale patch. Use a dedicated ink remover, test it on a hidden area first, and apply it sparingly to a cloth, working from the edge inward.
Dye transfer from clothing
Dye transfer from dark denim or new clothing often appears as a grey or blue haze on pale leather, usually sitting on the surface rather than deep in the hide. A leather cleaner applied sparingly to a cloth and dabbed gently can lift light transfer, do not scrub. If the dye has bonded or the patch is large, professional cleaning is safer, because over-treatment can dull the finish.
Scuffs and marks from shoes or furniture
Light scuffs often respond to a soft cloth and a little leather conditioner worked in with a circular motion. For deeper scuffs, use a purpose-made touch-up product matched to your finish. Avoid abrasive pads and magic erasers, which remove the top coat.
Keep a small stain kit near the chair: two dry microfibre cloths, a small pot of cornflour, and a pH-neutral leather cleaner. The faster you can blot a spill, the less likely it is to set.
When to stop and call a specialist
Stop home treatment and contact a professional leather restorer if:
- The stain is ink, dye, or a solvent-based product and has soaked into the hide
- The leather is aniline, nubuck, or suede, where liquids can cause permanent darkening
- The colour lifts onto your cloth during treatment
A specialist can assess whether the finish can be cleaned, refinished, or recoloured. Home methods cannot restore leather that has lost its surface coating, and stronger products usually make the damage worse.
Drying and Protecting Your Leather Armchair from Everyday Damage
Let the armchair air dry naturally, away from radiators, fires, and direct sunlight. Never use a hair dryer or heater to speed things up. Make sure air can circulate around the chair so moisture does not get trapped in the cushions.
How Often to Condition Leather Furniture
Use these signs to decide when to act:
- The leather feels dry or stiff when you touch it
- The surface looks dull, even after cleaning
- Fine lines or small creases appear in areas that bend often
- Dust clings to the surface more than usual
Do not condition on a schedule alone. Check the leather by feel and look first. Over-conditioning is a common mistake, so a thin, even layer is always better than a heavy one.
Spotting Damage Early and When to Call a Professional
Check your armchair every month or two for signs of wear.
Booking Your Next Leather Care Session with Tetrad Specialists
Explore the Tetrad range to find the armchair that suits your home and your care routine.
Frequently Asked Questions
How do you clean a natural leather armchair at home?
Start by removing loose dust with a soft brush attachment on a vacuum cleaner, then wipe the surface with a soft, dry microfibre cloth. For a deeper clean, use a pH-neutral leather cleaner or a very mild soap solution on a barely damp cloth, working in small sections. Always test the product on an inconspicuous area first, such as underneath the seat cushion, and wipe gently rather than soaking the leather. Allow the armchair to air dry away from direct heat before you move on to conditioning.
Can you use household products to clean leather furniture?
Some household products are safe, but many are not. A few drops of mild dish soap in warm water is generally gentle enough for natural leather, while white vinegar diluted heavily can help with some residues. Avoid bleach, ammonia, abrasive scouring pads, and strong degreasers, as these can strip the finish and cause drying or cracking. A purpose-made leather cleaner with a pH-neutral formula remains the safest choice for regular care.
How often should you condition a leather armchair?
Most natural leather armchairs benefit from conditioning roughly every six to twelve months, though this depends on how much sunlight, heat, and use the chair receives. Chairs in a sunny room or close to a radiator may need it more often, while a seldom-used chair may need less. Before applying a leather conditioner, clean the surface and test it on an inconspicuous area. A sign that conditioning is overdue is a dry, dull look or a rough feel to the touch.
What should you do if a leather armchair has stains?
Act quickly by blotting spills with a soft, dry cloth rather than rubbing, which can push the liquid deeper into the leather. For ink, oil, or grease, use a suitable leather cleaner and test it first on a hidden spot. Avoid soaking the area or applying heat to speed drying. For stubborn or large stains, or for any damage that has altered the leather’s colour or texture, contact a professional leather restorer rather than risking further harm.

